UNIX Primer
A basic introduction to UNIX/LINUX command line operations. Students will learn how to navigate a linux file system and perform basic operations on files such as listing, copying, renaming, etc.
Adapted by : Jason Walker, McDonnell Genome Institute
Additional adaptation by : Alex Wagner and Malachi Griffith, McDonnell Genome Institute
Original author : Keith Bradnam, UC Davis Genome Center
Version 1.05 — 2018-10-23
Introduction
This ‘bootcamp’ is intended to provide the reader with a basic overview of essential Unix/Linux commands that will allow them to navigate a file system and move, copy, and edit files. It will also introduce a brief overview of some ‘power’ commands in Unix. It was originally developed as part of a Bioinformatics Core Workshop taught at UC Davis (Using the Linux Command-Line for Analysis of High Throughput Sequence Data).
Why Unix?
The Unix operating system has been around since 1969. Back then there was no such thing as a graphical user interface. You typed everything. It may seem archaic to use a keyboard to issue commands today, but it is much easier to automate keyboard tasks than mouse tasks. There are several variants of Unix (including Linux and OSX), though the differences do not matter much for most basic functions.
Increasingly, the raw output of biological research exists as in silico data, usually in the form of large text files. Unix is particularly suited to working with such files and has several powerful (and flexible) commands that can process your data for you. The real strength of learning Unix is that most of these commands can be combined in an almost unlimited fashion. So, if you can learn just five Unix commands, you will be able to do a lot more than just five things.
Typeset Conventions
Command-line examples that you are meant to type into a terminal window will be shown indented in a constant-width font, e.g.
ls -lrh
Sometimes the accompanying text will include a reference to a Unix command. Any such text will also be in a constant-width, boxed font. E.g.
Type the
pwdcommand again.
From time to time this documentation will contain web links to pages that will help you find out more about certain Unix commands. Usually, the first mention of a command or function will be a hyperlink to Wikipedia. Important or critical points will be styled like so:
This is an important point!
Assumptions
The lessons from this point onwards will assume very little apart from the following:
- You have access to a Unix/Linux system
- You know how to launch a terminal program on that system
- You have a home or ‘workspace’ directory where you can create/edit new files In the following documentation, we will also assume that the logged in user has a username ‘ubuntu’ and the home directory is located at /home/ubuntu.
1. The Terminal
A terminal is the common name for the program that does two main things. It allows you to type input to the computer (i.e. run programs, move/view files etc.) and it allows you to see output from those programs. All Unix machines will have a terminal program available.
Open the terminal application. You should now see something that looks like the following:
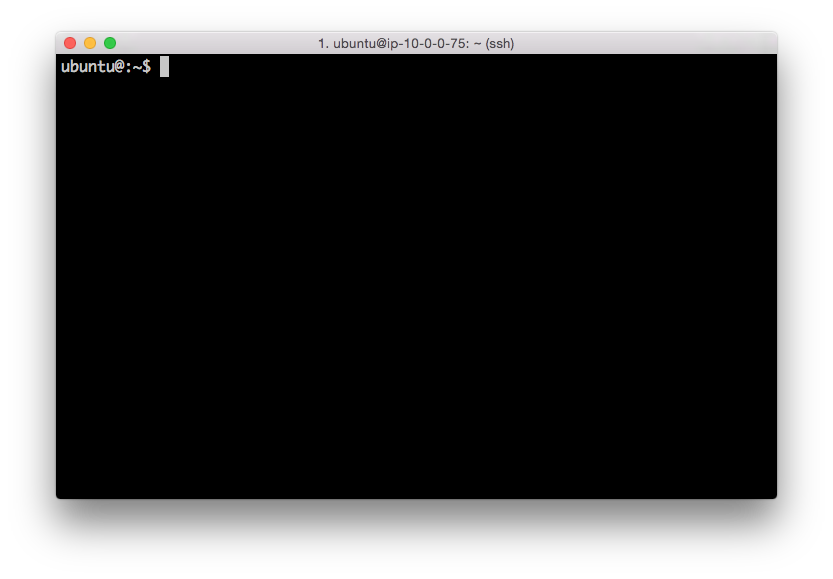
There will be many situations where it will be useful to have multiple terminals open and it will be a matter of preference as to whether you want to have multiple windows, or one window with multiple tabs (there are typically keyboard shortcuts for switching between windows, or moving between tabs).
2. Your First Unix Command
It’s important to note that you will always be inside a single directory when using the terminal. The default behavior is that when you open a new terminal you start in your own home directory (containing files and directories that only you can modify). To see what files and directories are in our home directory, we need to use the ls command. This command lists the contents of a directory. If we run the ls command we should see something like:
ls
# workspace
# ubuntu@:~$
There are four things that you should note here:
- You will probably see different output to what is shown here, it depends on your computer setup. Don’t worry about that for now.
- The
ubuntu@:~$text that you see is the Unix command prompt. In this case, it contains a user name (‘ubuntu’) and the name of the current directory (‘~’, more on that later). Note that the command prompt might not look the same on different Unix systems. In this case, the$sign marks the end of the prompt. - The output of the
lscommand lists only a single things. In this case, a directory, but they could also be files. We’ll learn how to tell them apart later on. - After the
lscommand finishes it produces a new command prompt, ready for you to type your next command. - In this tutorial, the commands you should try will be indicated in grey code blocks. Sometimes example output will be shown there as well but these lines will start with ‘# ‘
The ls command is used to list the contents of any directory, not necessarily the one that you are currently in. Try the following:
ls workspace/
# lost+found

ls /etc/perl
# CPAN  Net
3. The Unix Tree
Looking at directories from within a Unix terminal can often seem confusing. But bear in mind that these directories are exactly the same type of folders that you can see if you use any graphical file browser. From the root level (/) there are usually a dozen or so directories. You can treat the root directory like any other, e.g. you can list its contents:
ls /
# bin   dev  home        lib    lost+found  mnt  proc  run   snap  sys  usr  vmlinuz
# boot  etc  initrd.img  lib64  media       opt  root  sbin  srv   tmp  var  workspace
You might notice some of these names appearing in different colors. Many Unix systems will display files and directories differently by default. Other colors may be used for special types of files. When you log in to a computer you are working with your files in your home directory, and this is often inside a directory called ‘users’ or ‘home’.
4. Finding Out Where You Are
There may be many hundreds of directories on any Unix machine, so how do you know which one you are in? The command pwd will Print the Working Directory and that’s pretty much all this command does:
pwd
# /home/ubuntu
When you log in to a Unix computer, you are typically placed into your home directory. In this example, after we log in, we are placed in a directory called ‘ubuntu’ which itself is a subdirectory of another directory called ‘home’. Conversely, ‘users’ is the parent directory of ‘clmuser’. The first forward slash that appears in a list of directory names always refers to the top level directory of the file system (known as the root directory). The remaining forward slash (between ‘home’ and ‘ubuntu’) delimits the various parts of the directory hierarchy. If you ever get ‘lost’ in Unix, remember the pwd command.
As you learn Unix you will frequently type commands that don’t seem to work. Most of the time this will be because you are in the wrong directory, so it’s a really good habit to get used to running the pwd command a lot.
5. Making New Directories
If we want to make a new directory (e.g. to store some work related data), we can use the mkdir command:
mkdir workspace/Learning_unix
ls workspace
# Learning_unix lost+found
6. Changing Directories and Command Options
We are in the home directory on the computer but we want to to work in the new Learning_unix directory. To change directories in Unix, we use the cd command (“cd” for “change directory”):
cd workspace/Learning_unix
pwd
# /workspace/Learning_unix
Notice that — on this system — the command prompt has expanded to include our current directory. This doesn’t happen by default on all Unix systems, but you should know that you can configure what information appears as part of the command prompt.
Let’s make two new subdirectories and navigate into them:
mkdir Outer_directory
cd Outer_directory
pwd

mkdir Inner_directory
cd Inner_directory/
pwd
Now our command prompt is getting quite long, but it reveals that we are four levels beneath the home directory. We created the two directories in separate steps, but it is possible to use the mkdir command to do this all in one step.
Like most Unix commands, mkdir supports command-line options which let you alter its behavior and functionality. Command-line options are — as the name suggests — optional arguments that are placed after the command name. They often take the form of single letters (following a dash). If we had used the -p option of the mkdir command we could have done this in one step. E.g.
cd ~/workspace/Learning_unix/
mkdir -p Outer_directory/Inner_directory
Note the spaces on either side of the
-p!
Sometimes options are entire words, usually preceded by a double-dash. For example, using the --parents option:
mkdir --parents Outer_directory/Inner_directory
is identical to using the -p option.
Use the tree command to see the directories we just created:
cd ~/workspace/Learning_unix/
tree
7. Getting Help
Many programs will provide information about the command being called by passing a -h or --help option.
mkdir --help

# Usage: mkdir [OPTION]... DIRECTORY...
# Create the DIRECTORY(ies), if they do not already exist.

# Mandatory arguments to long options are mandatory for short options too.
#  -m, --mode=MODE   set file mode (as in chmod), not a=rwx - umask
#  -p, --parents     no error if existing, make parent directories as needed
#  -v, --verbose     print a message for each created directory
#  -Z                   set SELinux security context of each created directory
#                     to the default type
#                     --context[=CTX]  like -Z, or if CTX is specified then set the SELinux
#                     or SMACK security context to CTX
#                     --help     display this help and exit
#                     --version  output version information and exit

#GNU coreutils online help: <http://www.gnu.org/software/coreutils/>
#Full documentation at: <http://www.gnu.org/software/coreutils/mkdir>
#or available locally via: info '(coreutils) mkdir invocation'
In addition, many commands will have man (manual) pages, which are often more detailed descriptions of the program and its usage.
man ls
man man # yes even the man command has a manual page
When you are using the man command, press space to scroll down a page, b to go back a page, or q to quit. You can also use the up and down arrows to scroll a line at a time. The man command is actually using another Unix program, a text viewer called less, which we’ll come to later on. Before proceeding to the next section you must exit this view using q.
8. The Root Directory
Let’s change directory to the root directory, and then, into our home directory
cd /
cd home
cd ubuntu
In this case, we may as well have just changed directory in one go:
cd /home/ubuntu
The leading / is incredibly important. The following two commands are very different:
cd /home/ubuntu/
cd home/ubuntu/
The first command says go the ubuntu directory that is beneath the home directory that is at the top level (the root) of the file system. There can only be one /home/ubuntu directory on any Unix system.
The second command says go to the ubuntu directory that is beneath the home directory that is located wherever I am right now. There can potentially be many home/ubuntu directories on a Unix system (though this is unlikely).
Learn and understand the difference between these two commands.
9. Climbing The Tree
Frequently, you will find that you want to go ‘upwards’ one level in the directory tree. Two dots .. are used in Unix to refer to the parent directory of wherever you are. Every directory has a parent except the root level of the computer. Let’s go into the Learning_unix directory and then navigate up three levels:
cd /workspace/Learning_unix/
pwd
cd ..
pwd
cd ..
pwd
What if you wanted to navigate up two levels in the file system in one go? It’s very simple, just use two sets of the .. operator, separated by a forward slash:
cd /workspace/Learning_unix/
pwd
cd ../..
pwd
10. Absolute and Relative Paths
Using cd .. allows us to change directory relative to where we are now. You can also always change to a directory based on its absolute location. E.g. if you are working in the /home/ubuntu/workspace/Learning_unix directory and you then want to change to the /tmp directory, then you could do either of the following:
cd /workspace/Learning_unix/Outer_directory/Inner_directory/
cd ../../../../tmp
or…
$ cd /tmp
They both achieve the same thing, but the 2nd example requires that you know about the full path from the root level of the computer to your directory of interest (the ‘path’ is an important concept in Unix). Sometimes it is quicker to change directories using the relative path, and other times it will be quicker to use the absolute path.
11. Finding Your Way Back home
Remember that the command prompt shows you the name of the directory that you are currently in, and that when you are in your home directory it shows you a tilde character (~) instead? This is because Unix uses the tilde character as a short-hand way of specifying a home directory.
See what happens when you try the following commands (use the pwd command after each one to confirm the results if necessary):
cd /
cd ~
cd -
cd
Hopefully, you should find that cd and cd ~ do the same thing, i.e. they take you back to your home directory (from wherever you were). You will frequently want to jump straight back to your home directory, and typing cd is a very quick way to get there. You can also use the ~ as a quick way of navigating into subdirectories of your home directory when your current directory is somewhere else. cd - takes you to whatever your last directory was (like an “undo” on cd).
The quickest way of navigating from the root directory to your Learning_unix directory is as follows:
cd /workspace/Learning_unix
12. Making The ls Command More Useful
The .. operator that we saw earlier can also be used with the ls command, e.g. you can list directories that are ‘above’ you:
cd /workspace/Learning_unix/Outer_directory/
ls ../../
# Learning_unix  lost+found
Time to learn another useful command-line option. If you add the letter ‘l’ to the ls command it will give you a longer output compared to the default:
ls -l /workspace/Learning_unix
#total 4
#drwxrwxr-x 3 ubuntu ubuntu 4096 Oct 22 22:51 Outer_directory
For each file or directory we now see more information (including file ownership and modification times). The ‘d’ at the start of each line indicates that these are directories. There are many, many different options for the ls command. Try out the following (against any directory of your choice) to see how the output changes.
cd /usr/local/bin/kallisto_linux-v0.44.0
ls -l
ls -R
ls -l -t -r
ls -lh
Note that the last example combine multiple options but only use one dash. This is a very common way of specifying multiple command-line options.
13. Removing Directories
We now have a few (empty) directories that we should remove. To do this use the rmdir command, this will only remove empty directories so it is quite safe to use. If you want to know more about this command (or any Unix command), then remember that you can just look at its man page.
cd /workspace/Learning_unix/Outer_directory/
ls
rmdir Inner_directory/
ls
cd ..
rmdir Outer_directory/
ls
EXERCISE: Recreate the directories you just removed with a single command. Use the
--helpoption if you need to! Now remove them again, but this time in a single command.
Note, you have to be outside a directory before you can remove it with rmdir ***
14. Using Tab Completion
Saving keystrokes may not seem important, but the longer that you spend typing in a terminal window, the happier you will be if you can reduce the time you spend at the keyboard. Especially, as prolonged typing is not good for your body. So the best Unix tip to learn early on is that you can tab complete the names of files and programs on most Unix systems. Type enough letters that uniquely identify the name of a file, directory or program and press tab…Unix will do the rest. E.g. if you type ‘tou’ and then press tab, Unix should autocomplete the word to ‘touch’ (this is a command which we will learn more about in a minute). In this case, tab completion will occur because there are no other Unix commands that start with ‘tou’. If pressing tab doesn’t do anything, then you have not have typed enough unique characters. In this case pressing tab twice will show you all possible completions. This trick can save you a LOT of typing!
Navigate to your home directory, and then use the cd command to change to the Learning_unix directory. Use tab completion to complete directory name. If there are no other directories starting with ‘L’ in your home directory, then you should only need to type ‘cd’ + ‘L’ + ‘tab’.
cd /workspace
cd L<tab>
Tab completion will make your life easier and make you more productive!
Another great time-saver is that Unix stores a list of all the commands that you have typed in each login session. You can access this list by using the history command or more simply by using the up and down arrows to access anything from your history. So if you type a long command but make a mistake, press the up arrow and then you can use the left and right arrows to move the cursor in order to make a change.
15. Creating Empty Files With The Touch Command
The following sections will deal with Unix commands that help us to work with files, i.e. copy files to/from places, move files, rename files, remove files, and most importantly, look at files. First, we need to have some files to play with. The Unix command touch will let us create a new, empty file. The touch command does other things too, but for now we just want a couple of files to work with.
cd /workspace/Learning_unix/
touch red_fish.txt
touch blue_fish.txt
ls
# red_fish.txt  blue_fish.txt
touch also accepts multiple files as arguments.
touch one_fish.txt two_fish.txt
ls
# blue_fish.txt  one_fish.txt  red_fish.txt  two_fish.txt
16. Moving files
Now, let’s assume that we want to move these files to a new directory (‘colors’). We will do this using the Unix mv (move) command. Remember to use tab completion:
cd /workspace/Learning_unix/
mkdir colors
mv red_fish.txt colors/
mv blue_fish.txt colors/
ls
# colors  one_fish.txt  two_fish.txt

ls colors/
# blue_fish.txt  red_fish.txt
EXERCISE: Make a new directory called ‘counts’, and move one_fish.txt and two_fish.txt into it. Can you move the two files with a single
mvcommand?
For the mv command, we always have to specify a source file (or directory) that we want to move, and then specify a target location. If we had wanted to we could have moved both files in one go by typing any of the following commands:
mv *.txt Temp/
mv *t Temp/
mv *ea* Temp/
The asterisk * acts as a wild-card character. Likewise, the third example works because only those two files contain the letters ‘ea’ in their names. Using wild-card characters can save you a lot of typing.), essentially meaning ‘match anything’. The second example works because there are no other files or directories in the directory that end with the letters ‘t’ (if there was, then they would be moved too). Likewise, the third example works because only those two files contain the letters ‘ea’ in their names. Using wild-card characters can save you a lot of typing.
The ‘?’ character is also a wild-card but for only a single character.
17. Renaming Files
In the earlier example, the destination for the mv command was a directory name (colors). So we moved a file from its source location to a target location, but note that the target could have also been a (different) file name, rather than a directory. E.g. let’s make a new file and move it whilst renaming it at the same time:
cd /workspace/Learning_unix
touch rags
ls
# colors  counts  rags

mv rags counts/riches
ls counts/
# one_fish.txt    riches  two_fish.txt
In this example we create a new file (‘rags’) and move it to a new location and in the process change the name (to ‘riches’). So mv can rename a file as well as move it. The logical extension of this is using mv to rename a file without moving it (you have to use mv to do this as Unix does not have a separate ‘rename’ command):
cd /workspace/Learning_unix
mv counts/riches counts/rags
18. Moving Directories
It is important to understand that as long as you have specified a ‘source’ and a ‘target’ location when you are moving a file, then it doesn’t matter what your current directory is. You can move or copy things within the same directory or between different directories regardless of whether you are in any of those directories. Moving directories is just like moving files:
cd /workspace/Learning_unix
mkdir fish
mv counts fish
ls -R .
# .:
# colors  fish

# ./colors:
# blue_fish.txt  red_fish.txt

# ./fish:
# counts

# ./fish/counts:
# one_fish.txt  rags  two_fish.txt
This step moves the counts directory inside the fish directory.
EXERCISE: Try creating a ‘net’ directory inside ‘Learning_unix’ and then
cdto your home directory. Can you movefishinsidenetwithout usingcd?
19. Removing Files
You’ve seen how to remove a directory with the rmdir command, but rmdir won’t remove directories if they contain any files. So how can we remove the files we have created (inside Learning_Unix/Temp)? In order to do this, we will have to use the rm (remove) command.
Please read the next section VERY carefully. Misuse of the rm command can lead to needless death & destruction
Potentially, rm is a very dangerous command; if you delete something with rm, you will not get it back! It is possible to delete everything in your home directory (all directories and subdirectories) with rm, that is why it is such a dangerous command.
Let me repeat that last part again. It is possible to delete EVERY file you have ever created with the rm command. Are you scared yet? You should be. Luckily there is a way of making rm a little bit safer. We can use it with the -i command-line option which will ask for confirmation before deleting anything (remember to use tab-completion):
cd /workspace/Learning_unix/net/fish/counts
ls
# one_fish.txt  rags  two_fish.txt
rm -i one_fish.txt  rags  two_fish.txt
# rm: remove regular empty file 'one_fish.txt'? y
# rm: remove regular empty file 'rags'? y
# rm: remove regular empty file 'two_fish.txt'? y
ls
We could have simplified this step by using a wild-card (e.g. rm -i *.txt) or we could have made things more complex by removing each file with a separate rm command. Let’s finish cleaning up:
cd /workspace/Learning_unix/
ls
rmdir -p net/fish/counts/
ls
rm -ir colors/
ls
# rm: descend into directory 'colors/'? y
# rm: remove regular empty file 'colors/red_fish.txt'? y
# rm: remove regular empty file 'colors/blue_fish.txt'? y
# rm: remove directory 'colors/'? y
20. Copying Files
Copying files with the cp (copy) command is very similar to moving them. Remember to always specify a source and a target location. Let’s create a new file and make a copy of it:
cd /workspace/Learning_unix/
touch file1
cp file1 file2
ls
# file1  file2
What if we wanted to copy files from a different directory to our current directory? Let’s put a file in our home directory (specified by ~ remember?) and copy it to the current directory (Learning_unix):
touch ~/file3
ls ~
# file3  workspace
cp ~/file3 .
ls
# file1  file2  file3
This last step introduces another new concept. In Unix, the current directory can be represented by a . (dot) character. You will mostly use this only for copying files to the current directory that you are in. Compare the following:
ls
ls .
ls ./
In this case, using the dot is somewhat pointless because ls will already list the contents of the current directory by default. Also note how the trailing slash is optional.
21. Copying Directories
The cp command also allows us (with the use of a command-line option) to copy entire directories. Use cp --help to see how the -R or -r options let you copy a directory recursively.
EXERCISE: Create a new directory called ‘filing_cabinet’ and move the files into it with
mv. Make a second copy of this directory called ‘trash_can’. Are all of the files from ‘filing_cabinet’ also in ‘trash_can’? Remove both directories and their contents with a single command.
22. Viewing Files With Less
So far we have covered listing the contents of directories and moving/copying/deleting either files and/or directories. Now we will quickly cover how you can look at files. The less command lets you view (but not edit) text files. We will use the echo command to put some text in a file and then view it:
echo "Call me Ishmael."
# Call me Ishmael.
echo "Call me Ishmael." > opening_lines.txt
ls
# opening_lines.txt
echo >> opening_lines.txt #add a blank line to this file
base64 /dev/urandom | head -n 100 >> opening_lines.txt #Add some random text to this file
less opening_lines.txt
On its own, echo isn’t a very exciting Unix command. It just echoes text back to the screen. But we can redirect that text into an output file by using the > symbol. This allows for something called file redirection.
Careful when using file redirection (>), it will overwrite any existing file of the same name
When you are using less, you can bring up a page of help commands by pressing h, scroll forward a page by pressing space, or go forward or backwards one line at a time by pressing j or k. To exit less, press q (for quit). The less program also does about a million other useful things (including text searching). Before proceeding to the next section exit the less viewer using q.
23. Viewing Files With Cat
Let’s recreate our file with two lines to the file:
echo "Call me Ishmael." > opening_lines.txt
echo "The primroses were over." >> opening_lines.txt
cat opening_lines.txt
# Call me Ishmael.
# The primroses were over.
Notice that we use >> and not just >. This operator will append to a file. If we only used >, we would end up overwriting the file. The cat command displays the contents of the file (or files) and then returns you to the command line. Unlike less you have no control on how you view that text (or what you do with it). It is a very simple, but sometimes useful, command. You can use cat to quickly combine multiple files or, if you wanted to, make a copy of an existing file:
cat opening_lines.txt > file_copy.txt
ls
24. Counting Characters In A File
cd /workspace/Learning_unix
ls
# file_copy.txt  opening_lines.txt

ls -l
# total 4
# -rw-rw-r-- 1 ubuntu ubuntu 42 Jun 15 04:13 opening_lines.txt

wc opening_lines.txt
# 2  7 42 opening_lines.txt

wc -l opening_lines.txt
# 2 opening_lines.txt
The ls -l option shows us a long listing, which includes the size of the file in bytes (in this case ‘42’). Another way of finding this out is by using Unix’s wc command (word count). By default this tells you many lines, words, and characters are in a specified file (or files), but you can use command-line options to give you just one of those statistics (in this case we count lines with wc -l).
25. Editing Small Text Files With Nano
Nano is a lightweight editor installed on most Unix systems. There are many more powerful editors (such as ‘emacs’ and ‘vi’), but these have steep learning curves. Nano is very simple. You can edit (or create) files by typing:
nano opening_lines.txt
You should see the following appear in your terminal:
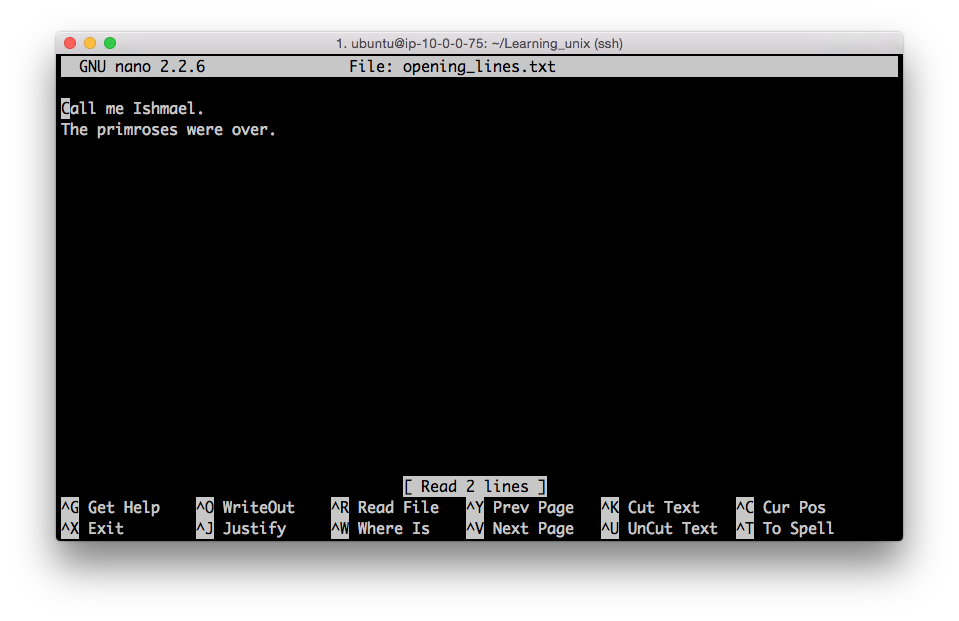
The bottom of the nano window shows you a list of simple commands which are all accessible by typing ‘Control’ plus a letter. E.g. Control + X exits the program.
26. The $PATH Environment Variable
One other use of the echo command is for displaying the contents of something known as environment variables. These contain user-specific or system-wide values that either reflect simple pieces of information (your username), or lists of useful locations on the file system. Some examples:
echo $USER
# ubuntu
echo $HOME
# /home/ubuntu
echo $PATH
# /usr/local/bin/root/bin:/usr/local/bin/miniconda/bin:/usr/local/sbin:/usr/local/bin:/usr/sbin:/usr/bin:/sbin:/bin:/usr/games:/usr/local/games:/snap/bin
The last one shows the content of the $PATH environment variable, which displays a — colon separated — list of directories that are expected to contain programs that you can run. This includes all of the Unix commands that you have seen so far. These are files that live in directories which are run like programs (e.g. ls is just a special type of file in the /bin directory).
Knowing how to change your $PATH to include custom directories can be necessary sometimes (e.g. if you install some new bioinformatics software in a non-standard location).
27. Matching Lines In Files With Grep
Use nano to add the following lines to opening_lines.txt:
Now is the winter of our discontent.
All children, except one, grow up.
The Galactic Empire was dying.
In a hole in the ground there lived a hobbit.
It was a pleasure to burn.
It was a bright, cold day in April, and the clocks were striking thirteen.
It was love at first sight.
I am an invisible man.
It was the day my grandmother exploded.
When he was nearly thirteen, my brother Jem got his arm badly broken at the elbow.
Marley was dead, to begin with.
You will often want to search files to find lines that match a certain pattern. The Unix command grep does this (and much more). The following examples show how you can use grep’s command-line options to:
- show lines that match a specified pattern
- ignore case when matching (
-i) - only match whole words (
-w) - show lines that don’t match a pattern (
-v) - Use wildcard characters and other patterns to allow for alternatives (
*,., and[])
    grep "was" opening_lines.txt
    # The Galactic Empire was dying.
    # It was a pleasure to burn.
    # It was a bright, cold day in April, and the clocks were striking thirteen.
    # It was love at first sight.
    # It was the day my grandmother exploded.
    # When he was nearly thirteen, my brother Jem got his arm badly broken at the elbow.
    # Marley was dead, to begin with.

    grep -v "was" opening_lines.txt
    # Call me Ishmael.
    # The primroses were over.
    # Now is the winter of our discontent.
    # All children, except one, grow up.
    # In a hole in the ground there lived a hobbit.
    # I am an invisible man.

    grep "all" opening_lines.txt
    #Call me Ishmael.

    grep -i "all" opening_lines.txt
    # Call me Ishmael.
    # All children, except one, grow up.

    grep "in" opening_lines.txt
    # Now is the winter of our discontent.
    # The Galactic Empire was dying.
    # In a hole in the ground there lived a hobbit.
    # It was a bright, cold day in April, and the clocks were striking  thirteen.
    # I am an invisible man.
    # Marley was dead, to begin with.

    grep -w "in" opening_lines.txt
    # In a hole in the ground there lived a hobbit.
    # It was a bright, cold day in April, and the clocks were striking thirteen.

    grep -w o.. opening_lines.txt
    # Now is the winter of our discontent.
    # All children, except one, grow up.

    grep [aeiou]t opening_lines.txt
    # In a hole in the ground there lived a hobbit.
    # It was love at first sight.
    # It was the day my grandmother exploded.
    # When he was nearly thirteen, my brother Jem got his arm badly broken at the elbow.
    # Marley was dead, to begin with.

    grep -w -i [aeiou]t opening_lines.txt
    # It was a pleasure to burn.
    # It was a bright, cold day in April, and the clocks were striking thirteen.
    # It was love at first sight.
    # It was the day my grandmother exploded.
    # When he was nearly thirteen, my brother Jem got his arm badly broken at the elbow.
28. Combining Unix Commands With Pipes
One of the most powerful features of Unix is that you can send the output from one command or program to any other command (as long as the second command accepts input of some sort). We do this by using what is known as a pipe. This is implemented using the ‘|’ character (which is a character which always seems to be on different keys depending on the keyboard that you are using). Think of the pipe as simply connecting two Unix programs. Here’s an example which introduces some new Unix commands:
    grep was opening_lines.txt | wc -c
    # 316

    grep "was" opening_lines.txt | sort | head -n 3 | wc -c
    # 130
The first use of grep searches the specified file for lines matching ‘was’, it sends the lines that match through a pipe to the wc program. We use the -c option to just count characters in the matching lines (316).
The second example first sends the output of grep to the Unix sort command. This sorts a file alphanumerically by default. The sorted output is sent to the head command which by default shows the first 10 lines of a file. We use the -n option of this command to only show 3 lines. These 3 lines are then sent to the wc command as before.
Whenever making a long pipe, test each step as you build it!
Shell Scripting
Advanced File Editing With Vim
Other Useful Commands
scp for transferring files over SSH
wget for downloading files from URL
watch for monitoring
xargs for complex inputs
ps for process status
top for running processes
kill for stopping processes
Miscellaneous Unix Power Commands
The following examples introduce some other Unix commands, and show how they could be used to work on a fictional file called file.txt. Remember, you can always learn more about these Unix commands from their respective man pages with the man command. These are not all real world cases, but rather show the diversity of Unix command-line tools:
tail -n 20 file.txt | head
- Show lines of a file that begin with a start codon (ATG) (the
^matches patterns at the start of a line):
grep "^ATG" file.txt
- Cut out the 3rd column of a tab-delimited text file and sort it to only show unique lines (i.e. remove duplicates):
cut -f 3 file.txt | sort -u
- Count how many lines in a file contain the words ‘cat’ or ‘bat’ (
-coption ofgrepcounts lines):
grep -c '[bc]at' file.txt
- Turn lower-case text into upper-case (using tr command to ‘transliterate’):
cat file.txt | tr 'a-z' 'A-Z'
- Change all occurrences of ‘Chr1’ to ‘Chromosome 1’ and write changed output to a new file (using sed command):
cat file.txt | sed 's/Chr1/Chromosome 1/' > file2.txt
Version History
- 2015-06-14 - Version 1.0, adapted from Unix and Perl for Biologists Primer
- 2015-06-24 - Version 1.01: clarified that this material is assuming user name is ‘ubuntu’and made other minor clarifications (such as what this material was first produced for).
- 2015-11-13 - Version 1.02: further adapted for CSHL 2015 Advanced Sequencing Technologies & Applications course.
- 2016-11-11 - Version 1.04: additional material for CSHL 2016 Advanced Sequencing Technologies & Applications course.
- 2018-10-23 - Version 1.05: modification to work with the 2018 PMBIO course.